Creative recycling is an activity that allows us to reuse material that we would otherwise throw away. But thanks to the tutorials that you will find in our gallery of images, you will discover several tips to decorate your home. In addition to decorations, you can create many useful objects in common life, such as containers and DIY vases from glass jars.
Creative recycling with material that would otherwise throw away
As we have already said, many new objects can make many of the materials that we throw in the trash every day. Also, The new ones can serve us as decorations and as objects to useful in daily life. And the keyword is creativity. Think the unthinkable. One of the many ideas is recycling plastic bottles, which are harmful to our planet. Beautiful pots can create from water bottles. Moreover, from the jars of creams, we can create containers for the beauty area. And not in the last place from toilet paper rolls we can create organizers for the desk. Also, you can easily create lotus flower drawing with toilet paper.
Creative recycling – A metal wheel can decorate
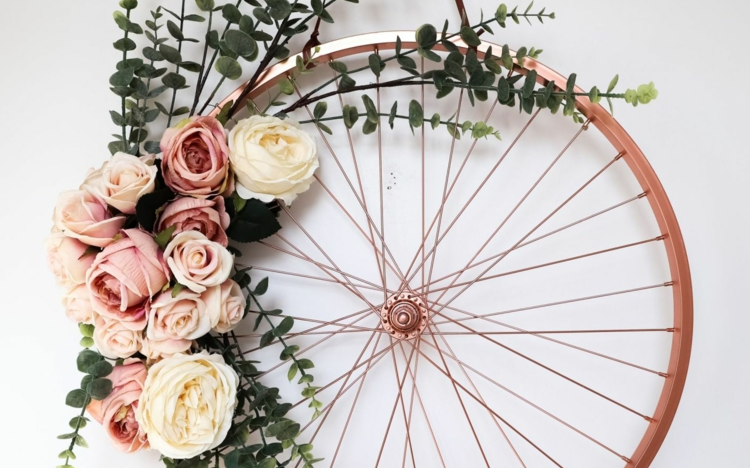
Materials:
· An old wheel from the bicycle
· Primer paint in silver color for metal
· Paint for the metal in gold color
· Fake flowers and sprigs
· Wire
· Plier
· Scissors
Instructions:
1. First, prepare the area where you are going to work. So cover the work areas well with newspaper or other paper.
2. Start by spraying some primer on the metal wheel. Also, It is useful for making the actual paint adhere well. Further, let it dry.
3. Once the primer dries, paint with gold color. Leave to dry again.
4. Meanwhile, put the flowers and twigs together. Hence, secure the bouquet with the wire.
5. Fix the flowers and twigs on the wheel using the wire again.
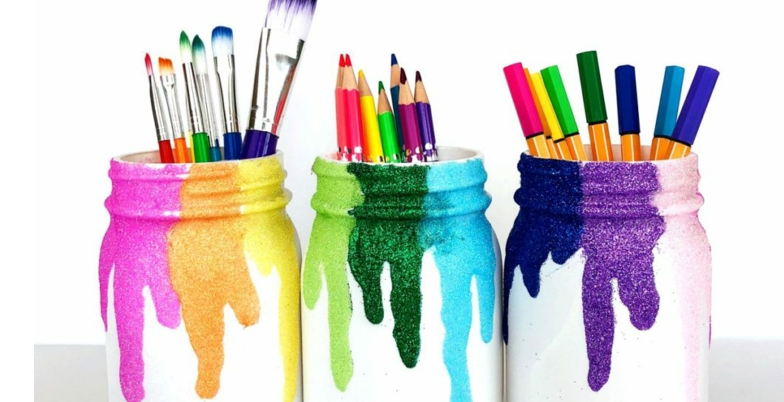
Organizer for the children’s desk
Materials:
· Glass jar
· Colorful glitter
· Glue
· White spray paint
Instructions:
1. First, start by painting the glass jar with white spray paint. Let it dry.
2. The effect we want to achieve is that of dripping glitter. Next, put some glue on the neck of the jar and give it a sprinkle of glitter. Thus, the glue spots need to be separated, as we want to get different smudges. Further, let it dry.
Creative recycling of cream containers
Materials:
· Empty containers from creams
· Adhesive letters
· White spray paint
· Black spray paint
· Small wooden handles
· Glue
Instructions:
1. First, you need to paint the empty cream jar and the cap. Also, the jar should be painted white and its cap black. Let it dry well.
2. When the different parts of our new container have dried well, we can decorate it. Glue sticky letters and fix the wooden handle with a little glue. Now, let the glue dry well.
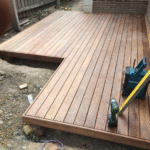
Another idea for reusing empty cream jars
Materials:
· Empty cream jars
· Marble gray spray paint
· Rope
· Hot glue gun
· Some dirt and pebbles
· Mini succulents
Instructions:
1. The initial phase of this job is to paint the container. Hence, paint the complete jar and let it dry.
2. Attach the string to the neck of the jar, using the glue from the hot glue gun. Leave to solidify.
3. On the base of the container, in addition, place some pebbles and soil.
4. Also, place the succulent plant.
The technique we adorn a plastic bottle
Materials:
· Plastic bottle
· Cutter
· Brush
· Vinyl glue
· Colorful paper napkin
· Topsoil
· Plants
Instructions:
1. The first step is to cut the plastic bottle with the utility knife.
2. Put some glue with the help of the brush on the entire surface of the bottle.
3. Place the design cut out of the paper napkins on the glue. Let it dry.
4. Put potting soil in the plastic bottle and plant the plant.
Also, prefer reading “Plan the Shopping for your Big Day!“
Makeup organizer from a shoebox
Materials:
· Three cardboard lids of shoeboxes
· Hot glue gun
· Ruler and pencil
· Cutter
· Spray paint in gold color
Instructions:
1. One of the cardboard lids will be the base of the organizer. Paint it with the splash cover and let it dry.
2. Take another lid and divide it into four equal parts with the pencil and ruler. Cut out with the utility knife. Also, all parts of the paper container must paint.
3. Moreover, glue the different parts of the compartments with the hot glue gun.
Creative recycling of toilet paper rolls
Materials:
· Toilet paper rolls
· Spray paint
· Solid square cardstock
· Hot glue gun
Instructions:
1. First, you need to paint all the parts of our organizer. Let them dry, both the cardboard base and the toilet paper rolls.
2. Glue the paper rolls to the center of the square card.
The keyword is reuse! On this occasion, we take care of creative recycling. This real art form allows objects to be thrown away. Thus, increasing an already unsustainable amount of waste, a second life. However, in the era of consumerism, recycling ideas are never enough: scrolling through the many images, which we have collected for our photo gallery. Also, you will find surprising, original, and above all useful proposals by recovering everyday objects and materials that (apparently) have run out of their life cycle. Further, from the wood of the pallets, the now-famous pallets, to plastic bottles. From corks or metal caps to food jars.
Further, from the bins to the fabric of old clothes. From tires to car rims. Thus, there are many possibilities for creative recycling that are useful both inside and outside the home. Also, you will find creative recycling solutions for the various rooms of an apartment and the balcony or garden. Hence, in short, there is something for everyone, and the important thing is to use a bit of imagination and not throw anything away!